






Closed Loop Sampler Installation Guide: From P&ID Hookup to Commissioning Walk-Down
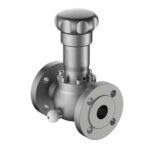
A correctly designed closed loop sampler delivers a representative process sample to the analyzer without dead volume, gas entrainment, or dead legs. But even a well-engineered system will produce bad data if it is installed the wrong way. This guide walks through the field-side installation of a closed loop sampler assembly: where to mount the sampler, how to hook it up to the process line, what utilities it needs, what tests to run before you energize it, and what commissioning steps verify the sample is representative from day one. The sequence below is the same one our commissioning team has used on Lukoil, BASF, and Sinopec projects, and it scales from a single-loop analyzer shelter to a multi-stream refinery sampling skid.
Before You Mount Anything: 5 Site-Readiness Checks
Most installation problems we are called back to fix are not assembly errors — they are site-readiness errors. Confirm these five points before the sampler arrives on site.
- Process tap location is accessible. The sample tap should be on the side of the pipe, not the top or bottom, and on a straight run at least 5 pipe diameters downstream of any fitting. If the tap is on a weldolet that is not flush-welded and re-ground, the probe will not seal.
- Cooling / heat-tracing utility is in place. Closed loop samplers handling crude, heavy oils, or any high-pour-point stream need a cooling water supply at 25-30 degC, 2-3 bar, with a thermostatic mixing valve. Confirm the cooling water return header is piped back to the cooling tower or chiller unit, and that the local isolation valves are present and labeled.
- Power and signal conduit is run. 24 VDC for the sampler solenoid, 4-20 mA return signal for the indicator, and a dedicated cable for the proximity switch on the sample cylinder carrier. All conduit entries must point down or sideways to keep water out, and all junction boxes must have drain plugs installed.
- Mounting surface is level and load-rated. A fully loaded sampler assembly with sample cylinder, regulator, and tubing weighs 35-60 kg. The mounting frame or Unistrut rack must be welded to embed plates that are tied back to the structural steel, not to handrail or cable tray. Verify with the structural team if the frame is on a new mezzanine.
- Vent and drain are piped to a safe location. The sampler has a low-point drain for sample spillage and a high-point vent for air purge. Both must be piped to a safe collection point (closed drain, atmospheric vent, or flare header) — never to the floor, never to the grade.
Step 1: Mount the Sampler Assembly
Mounting height is a small detail that pays back for the next 20 years. The right height is operator eye-level, typically 1.4-1.6 m above the walking surface. This puts the sample cylinder exchange point, the regulator knob, and the indicator gauge in a position where a technician can read them, adjust them, and replace the cylinder without a step ladder or stooping. Do not mount the sampler higher than 1.8 m — it makes cylinder removal awkward and increases the risk of dropping a hot or cold cylinder onto the deck.
Hardware and bolting
Use SS 316L bolting for any sampler mounted in a corrosive or offshore environment. For onshore refinery service, ASTM A193 B7 with PTFE thread sealant is acceptable. For sour service (H2S > 50 ppm), specify NACE MR0175-compliant bolting from the start — retrofitting later is expensive. Torque values follow the bolt manufacturer’s published data, typically 60-70% of the bolt yield for the size you have. Use a calibrated torque wrench, not an impact driver.
Anchor selection
On concrete, use chemical anchors (epoxy or vinylester), not expansion anchors — the vibration from the analyzer shelter and the thermal cycling of the sample stream will loosen expansion anchors over 2-3 years. On steel, use direct welding to embed plates, not through-bolts to handrail.
Step 2: Connect the Process Line
The process connection is the part most prone to installation error. The sample tap is already on the pipe (you confirmed this in site-readiness), so the work here is the tubing run from the tap to the sampler inlet.
Tube sizing and routing
Use 3/8″ OD x 0.049″ wall SS 316L electro-polished tubing for the process connection run. Anything smaller (1/4″ OD) creates excessive pressure drop and is prone to plugging. Anything larger (1/2″ OD) increases the sample volume in the line and worsens lag time. The tube run should be the shortest practical path, with no more than two 90-degree bends, and it should slope continuously downward from the tap to the sampler (or upward, with a purge point at the high spot, if the sampler is below the tap).
Hydrostatic test the connection
Before you connect the sampler end, hydrostatically test the process tap and tubing run to 1.5 times the design pressure, hold for 30 minutes, and walk the full length looking for leaks. The sample tap is a potential leak path that is hard to find after insulation is installed. Once the test passes, connect the sampler inlet and re-test at the sampler inlet fitting only.
Step 3: Tie In the Utilities
A closed loop sampler needs three utilities: instrument air, heat-tracing steam or electrical, and 24 VDC power. Connect them in this order so you can test each one in isolation.
- Instrument air for the pneumatic actuator on the fast-loop return valve. Supply pressure 4-6 barg, dew point -40 degC, oil-free. Connect to the air manifold with a filter-regulator-lubricator (FRL) unit, and verify the regulator outlet pressure is set to the design value (usually 4.0 barg).
- Heat-tracing on the process tubing run. Steam tracing for high-temperature service, electric heat-tracing for low-temperature. Verify the heat-tracing is operational and the tubing surface temperature stabilizes at the design value (typically 50-80 degC for crude service) before you introduce process sample.
- 24 VDC power to the sampler terminal box. Use a dedicated circuit from the analyzer shelter DC distribution, not a tapped connection from another instrument. Verify polarity, and verify the field ground is connected to the sampler body, not to the structural steel.
Step 4: Install the Sample Cylinder and Quick-Connect
Once the utilities are tested, install the sample cylinder carrier. The cylinder itself (typically 300-500 mL SS 316L double-ended) is rated to 1800 psig and is certified to DOT 3A or EN 10297. The quick-connect fittings (typically Swagelok QC4 or Festo CK-1/4) should be clean, dry, and capped until the moment of connection.
Leak-test the cylinder connection
After the cylinder is in place, pressurize the sampler enclosure with instrument air to 2 barg, soap-test every fitting, and hold for 10 minutes. Any leak is a leak. Do not proceed until the system is bubble-tight.
Step 5: Commissioning Walk-Down
Commissioning is the final gate before the sample is allowed to reach the analyzer. Run the walk-down in this sequence.
5.1 Leak test the assembled sampler
Pressurize the entire sampler assembly (process side + utility side) to 1.1 times the operating pressure, hold for 30 minutes, walk the full assembly with a leak detector or soap solution, and document the result. Any leak found at this point becomes a punch-list item, not a “we’ll fix it next turnaround”.
5.2 Purge and fill
Connect a nitrogen supply to the vent connection, open the vent, and purge the entire sample loop with 3-5 volume changes of nitrogen. Then close the vent, slowly crack open the process root valve, and allow the loop to fill with process sample. The first 3-5 cylinder volumes should be vented to closed drain, not to the analyzer — this is the “sampling the sample” step that gets the dead volume out of the system.
5.3 Verify the fast-loop flow
The fast-loop is what keeps the sample representative. Open the fast-loop return valve, set the inlet regulator to design pressure, and measure the flow at the rotameter or mass flow meter on the return. The design value is typically 1-2 L/min for gas service and 5-10 L/min for liquid service. If the measured flow is less than 80% of design, the line is restricted — check the inlet filter.
5.4 Verify the analyzer side-stream
Open the needle valve on the analyzer tap, set the analyzer flow to design (typically 100-200 cc/min), and verify the analyzer reads the expected value for the stream (e.g. water-cut meter reads the known water cut, conductivity reads the known conductivity). If the reading is off, the sample conditioning is wrong — go back to step 5.2 and re-fill.
5.5 Sign off
Document the commissioning data on the standard commissioning sheet: leak test results, flow values, pressure readings, analyzer reading vs. expected, sample cylinder serial number, and the operator who witnessed the walk-down. The signed sheet is what the operations team takes over from your commissioning team.
6 Common Installation Mistakes
| Mistake | Symptom | Fix |
|---|---|---|
| Tap on top of horizontal pipe | Sample is gas, not liquid | Re-tap on side of pipe, at least 5D downstream of any fitting |
| No continuous slope on tubing run | Sample lags 20-30 minutes; pockets of stale sample | Re-route tubing with continuous slope, add intermediate drain |
| Mounted too high (>1.8 m) | Cylinder drop risk, operator does not use it correctly | Re-mount at 1.4-1.6 m, or provide permanent platform with handrail |
| Heat-tracing not tested before sample introduction | Sample cools, wax drops out, line plugs | Operate heat-tracing for 24 hours before introducing sample |
| Sampler in unclassified enclosure in hazardous area | Ignition source, code violation | Re-house in Ex d enclosure rated for gas group and T-class |
| First-fill volume routed to analyzer | Dead volume at analyzer gives false reading for first 1-2 hours | Route first 3-5 cylinder volumes to closed drain |
How This Connects to the Rest of the System
The closed loop sampler is the front end of the analyzer sample system. The design choices you make at installation time directly affect the analyzer’s data quality. A sampler that is mounted at the wrong height, connected to a poorly placed tap, or operated with a faulty fast-loop will produce an analyzer reading that drifts, lags, or just plain lies. For a deeper look at the design decisions that lead up to this installation, see our sampling system design guide. For the specific components that mount on the sampler body — quick connects, needle valves, and tube fittings — see our sampling fittings category.
For help with your specific installation — design review, component selection, or field commissioning — contact our engineering team. We have commissioned closed loop samplers in refineries, petrochemical plants, and offshore platforms across the EU, North America, the Middle East, and Asia, and we can support your project from P&ID to walk-down.
 English
 Russian
 Arabic
 Spanish
 Portuguese
 Chinese