






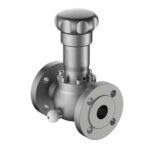
Guia de instalação do amostrador de circuito fechado: da conexão no P&ID à inspeção de comissionamento
Um projeto corretamente elaborado amostrador de circuito fechado fornece uma amostra representativa do processo ao analisador, sem volume morto, arrastamento de gás ou trechos sem fluxo. No entanto, mesmo um sistema bem projetado produzirá dados incorretos se for instalado de maneira incorreta. Este guia orienta a instalação em campo de um conjunto de amostrador de circuito fechado: onde montar o amostrador, como conectá-lo à linha de processo, quais utilidades ele necessita, quais testes devem ser realizados antes de colocá-lo em operação e quais etapas de comissionamento garantem que a amostra seja representativa desde o primeiro dia. A sequência abaixo é a mesma que nossa equipe de comissionamento utilizou em projetos da Lukoil, BASF e Sinopec, e é aplicável tanto a um abrigo de analisador de circuito único quanto a um skid de amostragem de refinaria com múltiplas correntes.
Antes de instalar qualquer coisa: 5 verificações para avaliar se o local está pronto
A maioria dos problemas de instalação para os quais somos chamados para corrigir não se deve a erros de montagem — trata-se, na verdade, de erros relacionados à preparação do local. Verifique estes cinco pontos antes que o amostrador chegue ao local.
- É possível acessar o local da torneira de processo. A tomada de amostra deve estar localizada na lateral do tubo, e não na parte superior ou inferior, e em um trecho reto a pelo menos 5 diâmetros do tubo a jusante de qualquer conexão. Se a tomada estiver em um “weldolet” que não tenha sido soldado à face e reajustado, a sonda não fará vedação.
- O sistema de refrigeração/aquecimento de tubulações já está instalado. Amostradores de circuito fechado que lidam com petróleo bruto, óleos pesados ou qualquer fluxo com alto ponto de fluidez precisam de um suprimento de água de resfriamento a 25-30 °C, 2-3 bar, com uma válvula misturadora termostática. Verifique se o coletor de retorno da água de resfriamento está conectado à torre de resfriamento ou à unidade de resfriamento e se as válvulas de isolamento locais estão presentes e identificadas.
- A instalação dos conduítes de energia e de sinalização foi concluída. 24 VCC para o solenóide do amostrador, sinal de retorno de 4 a 20 mA para o indicador e um cabo específico para o sensor de proximidade no suporte do cilindro de amostragem. Todas as entradas dos conduítes devem estar voltadas para baixo ou para o lado, a fim de impedir a entrada de água, e todas as caixas de junção devem ter tampões de drenagem instalados.
- A superfície de montagem está nivelada e tem capacidade de carga nominal. Um conjunto de amostragem totalmente equipado, com cilindro de amostragem, regulador e tubulação, pesa entre 35 e 60 kg. A estrutura de montagem ou o rack Unistrut deve ser soldado a placas de fixação que estejam presas à estrutura de aço, e não ao corrimão ou à bandeja de cabos. Verifique com a equipe de estrutura se a estrutura estiver localizada em um novo mezanino.
- A ventilação e o drenagem são canalizados para um local seguro. O amostrador possui um dreno no ponto mais baixo para o escoamento de amostras derramadas e um respirador no ponto mais alto para a purga de ar. Ambos devem ser conectados por tubulação a um ponto de coleta seguro (dreno fechado, respirador atmosférico ou coletor de queima) — nunca no chão, nunca no nível do solo.
Etapa 1: Montar o conjunto do amostrador
A altura de montagem é um pequeno detalhe que compensa nos próximos 20 anos. A altura correta é a altura dos olhos do operador, normalmente 1,4 a 1,6 m acima da superfície de circulação. Isso coloca o ponto de troca do cilindro de amostragem, o botão do regulador e o medidor indicador em uma posição em que o técnico possa lê-los, ajustá-los e substituir o cilindro sem precisar usar uma escada ou se abaixar. Não instale o amostrador a uma altura superior a 1,8 m — isso dificulta a remoção do cilindro e aumenta o risco de deixar cair um cilindro quente ou frio no convés.
Ferragens e parafusos
Utilize parafusos de aço inoxidável 316L para qualquer amostrador instalado em ambiente corrosivo ou offshore. Para serviços em refinarias em terra, é aceitável a norma ASTM A193 B7 com vedante de rosca de PTFE. Para serviços em ambientes ácidos (H₂S > 50 ppm), especifique parafusos em conformidade com a norma NACE MR0175 desde o início — a adaptação posterior é cara. Os valores de torque devem seguir os dados publicados pelo fabricante dos parafusos, normalmente 60-70% do limite de escoamento do parafuso para o tamanho que você possui. Use uma chave de torque calibrada, e não uma chave de impacto.
Seleção de âncoras
No concreto, utilize âncoras químicas (epóxi ou viniléster), e não âncoras de expansão — a vibração proveniente do abrigo do analisador e os ciclos térmicos do fluxo de amostra farão com que as âncoras de expansão se soltem ao longo de 2 a 3 anos. No aço, utilize soldagem direta para fixar as placas, e não parafusos de passagem no corrimão.
Etapa 2: Conecte a linha de processo
A conexão do processo é a parte mais suscetível a erros de instalação. A torneira de amostragem já está instalada no tubo (você confirmou isso durante a verificação da prontidão do local), portanto, o trabalho aqui consiste na instalação da tubulação entre a torneira e a entrada do amostrador.
Dimensionamento e traçado dos tubos
Utilize tubulação de aço inoxidável 316L eletropolida com diâmetro externo de 3/8″ e espessura de parede de 0,049″ para o trecho de conexão do processo. Qualquer diâmetro menor (1/4″ de diâmetro externo) causa queda de pressão excessiva e está sujeito a entupimento. Qualquer diâmetro maior (1/2″ de diâmetro externo) aumenta o volume da amostra na linha e piora o tempo de atraso. O trajeto do tubo deve ser o caminho mais curto possível, com no máximo duas curvas de 90 graus, e deve apresentar inclinação contínua para baixo desde a torneira até o amostrador (ou para cima, com um ponto de purga no ponto mais alto, caso o amostrador esteja abaixo da torneira).
Realizar um teste hidrostático na conexão
Antes de conectar a extremidade do amostrador, realize um teste hidrostático na derivação do processo e no trecho de tubulação a 1,5 vezes a pressão de projeto, mantenha a pressão por 30 minutos e inspecione todo o comprimento em busca de vazamentos. A tomada de amostragem é um ponto de vazamento em potencial que fica difícil de detectar após a instalação do isolamento. Após a aprovação do teste, conecte a entrada do amostrador e repita o teste apenas na conexão de entrada do amostrador.
Etapa 3: Conectar os serviços públicos
Um amostrador de circuito fechado requer três serviços: ar de instrumento, vapor ou energia elétrica para aquecimento de tubulação e alimentação de 24 VCC. Conecte-os nessa ordem para que você possa testar cada um separadamente.
- Ar de instrumentação para o atuador pneumático da válvula de retorno de malha rápida. Pressão de alimentação de 4 a 6 barg, ponto de orvalho de -40 °C, sem óleo. Conecte-o ao manifold de ar por meio de uma unidade filtro-regulador-lubrificador (FRL) e verifique se a pressão de saída do regulador está ajustada no valor de projeto (geralmente 4,0 barg).
- Aquecimento por fio elétrico na tubulação do processo. Aquecimento por vapor para serviço em alta temperatura; aquecimento elétrico para baixa temperatura. Verifique se o aquecimento está em funcionamento e se a temperatura da superfície da tubulação se estabiliza no valor de projeto (normalmente 50–80 °C para serviço com petróleo bruto) antes de introduzir a amostra do processo.
- Alimentação de 24 VCC à caixa de terminais do amostrador. Utilize um circuito exclusivo da distribuição de corrente contínua (CC) do abrigo do analisador, e não uma conexão derivada de outro instrumento. Verifique a polaridade e certifique-se de que o aterramento de campo esteja conectado ao corpo do amostrador, e não à estrutura de aço.
Etapa 4: Instale o cilindro de amostragem e o conector rápido
Após o teste dos equipamentos, instale o suporte do cilindro de amostra. O próprio cilindro (normalmente de 300 a 500 mL, em aço inoxidável 316L, com extremidades duplas) tem capacidade nominal de 1.800 psig e é certificado segundo as normas DOT 3A ou EN 10297. As conexões de engate rápido (normalmente Swagelok QC4 ou Festo CK-1/4) devem estar limpas, secas e tampadas até o momento da conexão.
Faça um teste de vazamento na conexão do cilindro
Depois que o cilindro estiver posicionado, pressurize o compartimento do amostrador com ar de instrumento a 2 barg, faça o teste com sabão em todas as conexões e aguarde por 10 minutos. Qualquer vazamento é considerado um vazamento. Não prossiga até que o sistema esteja totalmente estanque.
Etapa 5: Inspeção de comissionamento
O comissionamento é a última etapa antes de a amostra ser encaminhada ao analisador. Execute a verificação passo a passo nesta sequência.
5.1 Realizar o teste de estanqueidade do amostrador montado
Pressurize todo o conjunto do amostrador (lado do processo + lado de utilidades) a 1,1 vez a pressão de operação, mantenha a pressão por 30 minutos, verifique todo o conjunto com um detector de vazamentos ou solução de sabão e documente o resultado. Qualquer vazamento detectado neste momento passa a ser um item da lista de pendências, e não algo do tipo “vamos consertar na próxima parada para manutenção”.
5.2 Purgar e encher
Conecte um suprimento de nitrogênio à conexão de ventilação, abra a válvula de ventilação e purgue todo o circuito de amostragem com 3 a 5 trocas de volume de nitrogênio. Em seguida, feche a válvula de ventilação, abra lentamente a válvula principal do processo e deixe o circuito encher com a amostra do processo. Os primeiros 3 a 5 volumes de cilindro devem ser liberados para um dreno fechado, e não para o analisador — essa é a etapa de “amostragem da amostra”, que remove o volume morto do sistema.
5.3 Verificar o fluxo do circuito rápido
O circuito rápido é o que mantém a amostra representativa. Abra a válvula de retorno do circuito rápido, ajuste o regulador de entrada para a pressão de projeto e meça o vazão no rotâmetro ou no medidor de vazão mássica no retorno. O valor de projeto é normalmente de 1 a 2 L/min para serviço com gás e de 5 a 10 L/min para serviço com líquido. Se a vazão medida for inferior a 80% do valor de projeto, a linha está obstruída — verifique o filtro de entrada.
5.4 Verificar o fluxo secundário do analisador
Abra a válvula de agulha na torneira do analisador, ajuste o fluxo do analisador para o valor nominal (normalmente 100–200 cc/min) e verifique se o analisador indica o valor esperado para o fluxo (por exemplo, o medidor de teor de água indica o teor de água conhecido, e o medidor de condutividade indica a condutividade conhecida). Se a leitura estiver incorreta, o condicionamento da amostra está errado — volte à etapa 5.2 e reabasteça.
5.5 Aprovação
Registre os dados de comissionamento na folha padrão de comissionamento: resultados do teste de vazamento, valores de vazão, leituras de pressão, comparação entre a leitura do analisador e o valor esperado, número de série do cilindro de amostra e o nome do operador que testemunhou a verificação final. A folha assinada é o documento que a equipe de operações recebe da equipe de comissionamento.
6 erros comuns na instalação
| Erro | Sintoma | Corrigir |
|---|---|---|
| Toque na parte superior do tubo horizontal | A amostra é um gás, não um líquido | Faça uma nova rosca na lateral do tubo, a pelo menos 5D a jusante de qualquer conexão |
| Não há inclinação contínua no trecho da tubulação | A amostra apresenta um atraso de 20 a 30 minutos; há áreas com amostra estagnada | Reorientar a tubulação com inclinação contínua e adicionar um dreno intermediário |
| Instalado muito alto (>1,8 m) | Risco de queda do cilindro, o operador não o utiliza corretamente | Reinstale a uma altura de 1,4 a 1,6 m ou instale uma plataforma permanente com corrimão |
| O sistema de aquecimento não foi testado antes da introdução da amostra | A amostra esfria, a cera se separa e a linha fica entupida | Mantenha o sistema de aquecimento em funcionamento por 24 horas antes de introduzir a amostra |
| Amostrador em compartimento não classificado em área perigosa | Fonte de ignição, violação de código | Reinstalação em caixa Ex d classificada para o grupo de gás e a classe T |
| Volume do primeiro enchimento encaminhado para o analisador | O volume morto no analisador gera uma leitura incorreta nas primeiras 1 a 2 horas | Desvie os primeiros 3 a 5 volumes de cilindro para um dreno fechado |
Como isso se relaciona com o restante do sistema
O amostrador de circuito fechado é a parte inicial do sistema de amostragem do analisador. As escolhas de projeto feitas no momento da instalação afetam diretamente a qualidade dos dados do analisador. Um amostrador montado na altura errada, conectado a uma torneira mal posicionada ou operado com um circuito rápido com defeito produzirá uma leitura do analisador que apresenta desvios, atrasos ou simplesmente dados incorretos. Para uma análise mais aprofundada das decisões de projeto que levaram a essa instalação, consulte nosso guia de projeto de sistemas de amostragem. Para os componentes específicos que são montados no corpo do amostrador — conexões rápidas, válvulas de agulha e conexões para tubos — consulte nosso categoria de conexões para amostragem.
Para obter ajuda com sua instalação específica — análise do projeto, seleção de componentes ou comissionamento em campo — entre em contato com nossa equipe de engenharia. Já instalamos amostradores de circuito fechado em refinarias, usinas petroquímicas e plataformas offshore na União Europeia, na América do Norte, no Oriente Médio e na Ásia, e podemos dar suporte ao seu projeto desde os diagramas P&ID até a inspeção no local.
 English
 Russian
 Arabic
 Spanish
 Portuguese
 Chinese